Calibration and Identification
Use this workflow to collect vibration calibration data, run cloud identification, and verify the resulting Covalent Shaper model with a vibration test.
Step 1: Setup the SDK
Go over the First Steps from Get Started to generate your API token and robot ID and install the Reforge Robotics SDK.
Before continuing, confirm that you have:
- The robot IP address.
- The local PC IP address, if required by the robot SDK.
- The robot SDK token, if required by the robot manufacturer.
- The Reforge robot ID.
- The Reforge API token.
Step 2: Run Calibration and Identification
Run calibration from the repository root. The command below collects Shaper calibration data and immediately sends the data to Reforge Cloud for model identification:
bashpython3 -m robot.run calibrate \
  <ROBOT_IP> \
  --type shaper \
  --local_ip <LOCAL_IP> \
  --sdk_token <ROBOT_SDK_TOKEN> \
  --robot_id <REFORGE_ROBOT_ID> \
  --freq 250 \
  --identify <REFORGE_API_TOKEN>
If your robot SDK does not require --local_ip or --sdk_token, omit those arguments:
bashpython3 -m robot.run calibrate \
  <ROBOT_IP> \
  --type shaper \
  --robot_id <REFORGE_ROBOT_ID> \
  --freq 250 \
  --identify <REFORGE_API_TOKEN>
During calibration, the robot executes sine-sweep motions across the configured workspace. Keep the robot workspace clear and monitor the run until it finishes.
The calibration data is stored under src/robot/data/. The exact data folder path is printed by the command; save it because the vibration test uses the same folder.
When identification succeeds, the identified PyTorch models are downloaded into:
textsrc/robot/models/current/shaper
The same model files are also stored in a dated model folder under src/robot/models/. All files in the folder are necessary for using the Shaper.
Step 3: Run Identification Separately
If you already collected calibration data without --identify, run identification separately:
bashpython3 -m robot.run identify \
  <REFORGE_API_TOKEN> \
  <REFORGE_ROBOT_ID> \
  <LOCAL_DATA_FOLDER>
Use the calibration data folder printed by the calibration command. For example:
textsrc/robot/data/2026-6-30
After identification finishes, confirm that src/robot/models/current/shaper contains the updated Shaper model files before running control or vibration testing.
Step 4: Run the Vibration Test
Once the model is available in src/robot/models/current/shaper, run the vibration test:
bashpython3 -m robot.run vibration_test \
  <ROBOT_IP> \
  <LOCAL_DATA_FOLDER> \
  --local_ip <LOCAL_IP> \
  --sdk_token <ROBOT_SDK_TOKEN> \
  --freq 250
If your robot SDK does not require --local_ip or --sdk_token, omit those arguments:
bashpython3 -m robot.run vibration_test \
  <ROBOT_IP> \
  <LOCAL_DATA_FOLDER> \
  --freq 250
The vibration test selects poses from the calibration data, runs one uncompensated motion and one compensated motion at each pose, records accelerometer data, and prints the vibration-reduction result.
Step 5: Check the Expected Result
The expected accelerometer readings should show substantially lower residual acceleration when Covalent Shaper is enabled.
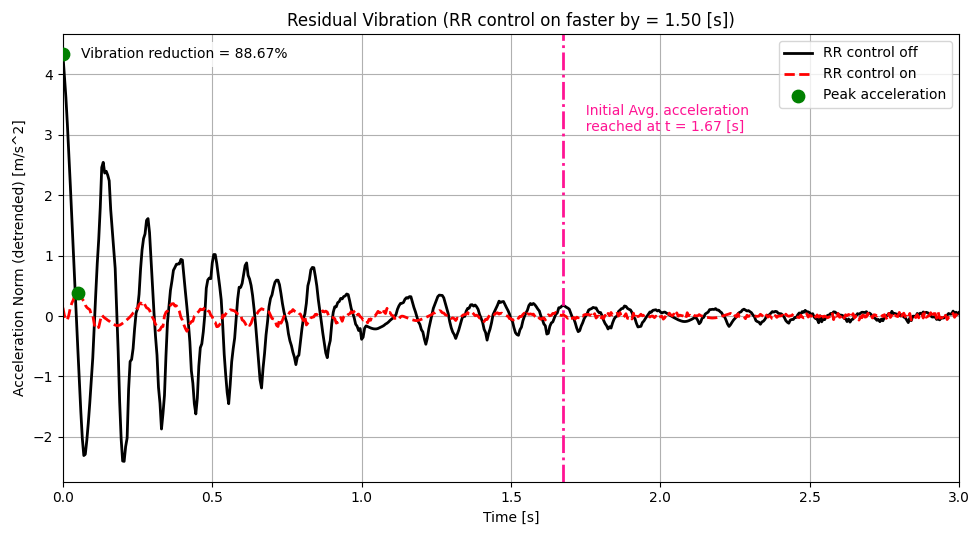
Expected accelerometer readings from the vibration test, comparing residual vibration with Covalent Shaper off and on.
The video below shows the corresponding robot behavior.
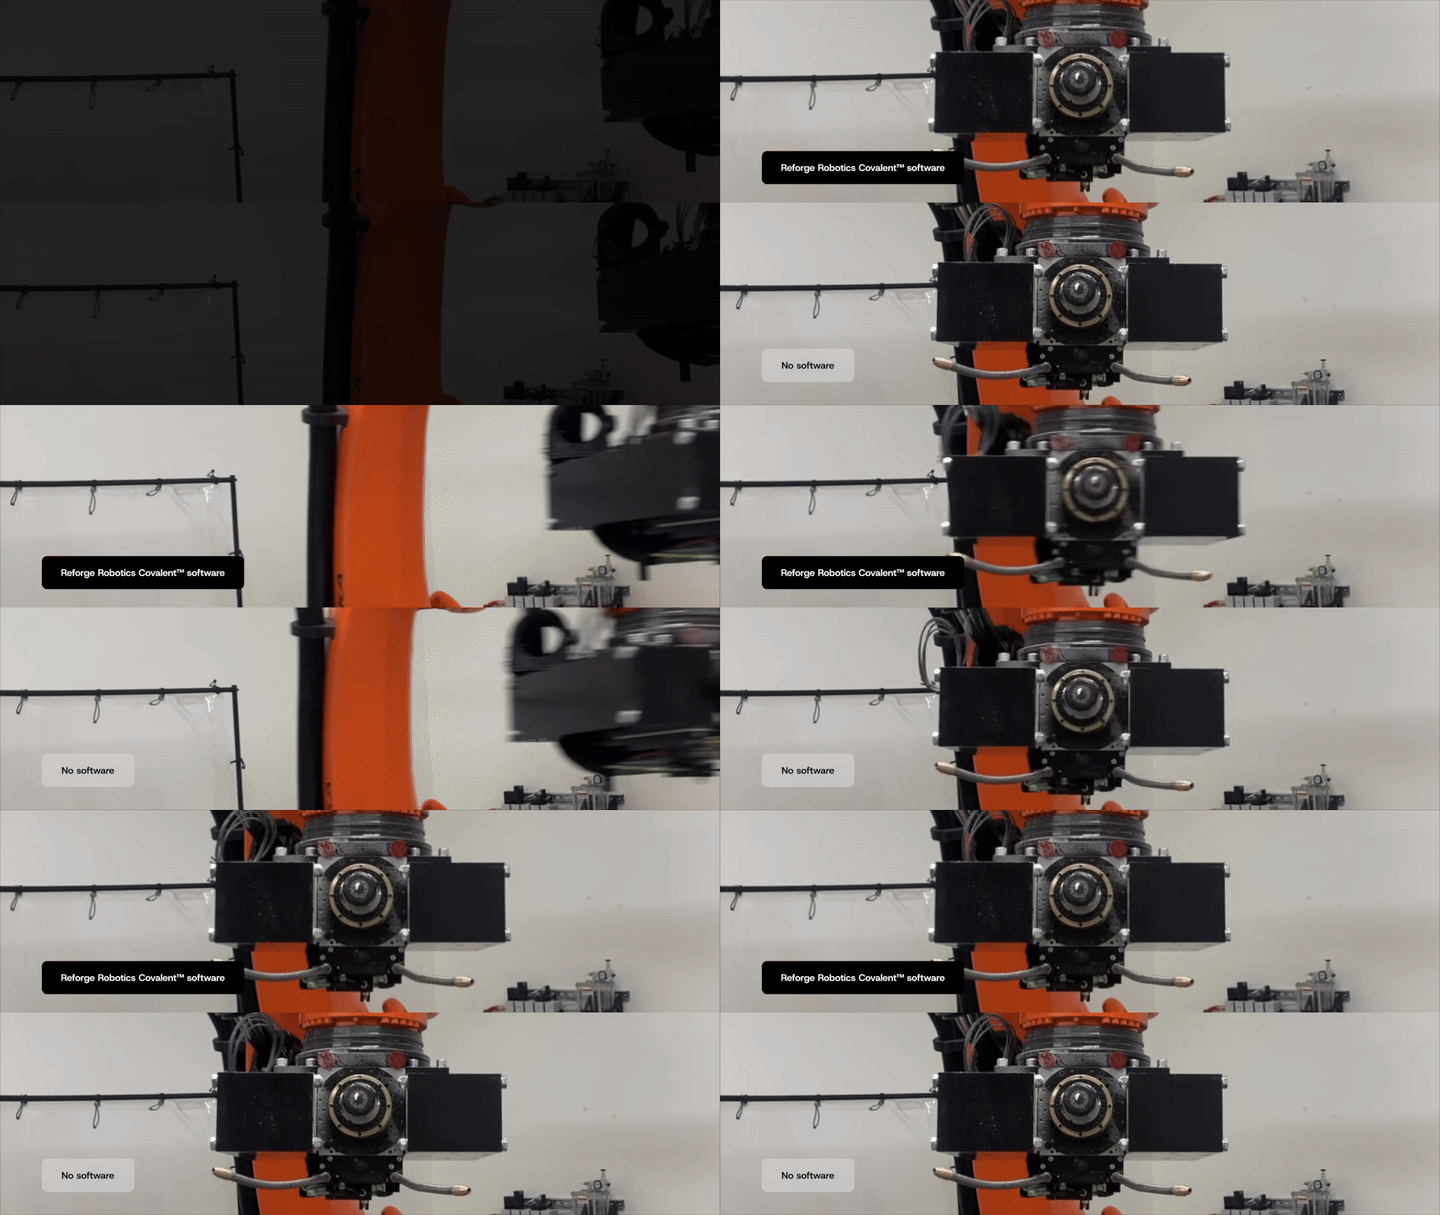
Comparison of the vibration on a robot arm end effector, using original control vs. Covalent Shaper.
If vibration reduction is weak, collect more calibration data and fine-tune the model.
Step 6: Fine-Tune the Model
To collect new calibration data and fine-tune immediately, run:
bashpython3 -m robot.run calibrate \
  <ROBOT_IP> \
  --type shaper \
  --local_ip <LOCAL_IP> \
  --sdk_token <ROBOT_SDK_TOKEN> \
  --robot_id <REFORGE_ROBOT_ID> \
  --freq 250 \
  --fine_tune <REFORGE_API_TOKEN>
To fine-tune from an existing calibration data folder, run:
bashpython3 -m robot.run fine_tune \
  <REFORGE_API_TOKEN> \
  <REFORGE_ROBOT_ID> \
  <LOCAL_DATA_FOLDER>
After fine-tuning finishes, rerun the vibration test and compare the residual acceleration plot again.