
First Steps
Start using advanced robot controllers.
System Setup
Hardware and software setup required to use Reforge's software.
Hardware Setup
Reforge calibration requires (soft) real-time access to the robot controls, which entails the following minimum requirements:
| Workstation/robot PC | |
|---|---|
| Operating system | Ubuntu 24.04.3 LTS or later (for C++ builds) |
| CPU platform | x86_64 or arm64 |
| CPU performance | Depends on computation load of user program |
| Network | |
|---|---|
| Nodes | 1 workstation PC and 1 robot server |
| Connection | Wired LAN |
| Latency | Round trip <1 ms |
| Bandwidth | Send/receive both ways < 1.0MiB/s |
Sensors and Data
Successful integration assumes the robot has the following capabilities:
- An accelerometer located at the tool center point (TCP) of its end-effector that can measure data in the x-, y-, and z-coordinates of the end-effector’s inertial frame of reference (or the robot base’s inertial frame).
- Encoders in each joint that can accurately measure the current joint position of the robot at a rate of 200 Hz or higher.
- A real-time API to access data from (1) and (2) and to command the joint positions with time-domain angular motor positions.
- A URDF file that describes the robot’s kinematics and dynamics (dynamics optional but preferred).
If you do not have an embedded accelerometer and would like to use an external accelerometer on the robot, we have a solution for that. Please contact us for support.
Software Setup
Reforge requires setting up and running Python 3.10 (or later) on the robot. For robot SDKs that use the Robot Operating System (ROS), a ROS 2 installation is also required. Instructions to install the Python and ROS 2 packages can be found from a variety of sources on the internet. For pure C++ support, please contact us.
Calibrate Your Robot
Get data to create a model of your robot.
Step 1: Create an Account and Register a Robot
Create or log into your Reforge Robotics account at app.reforgerobotics.com. You will be prompted to set up your first robot and get your API token for calibration.
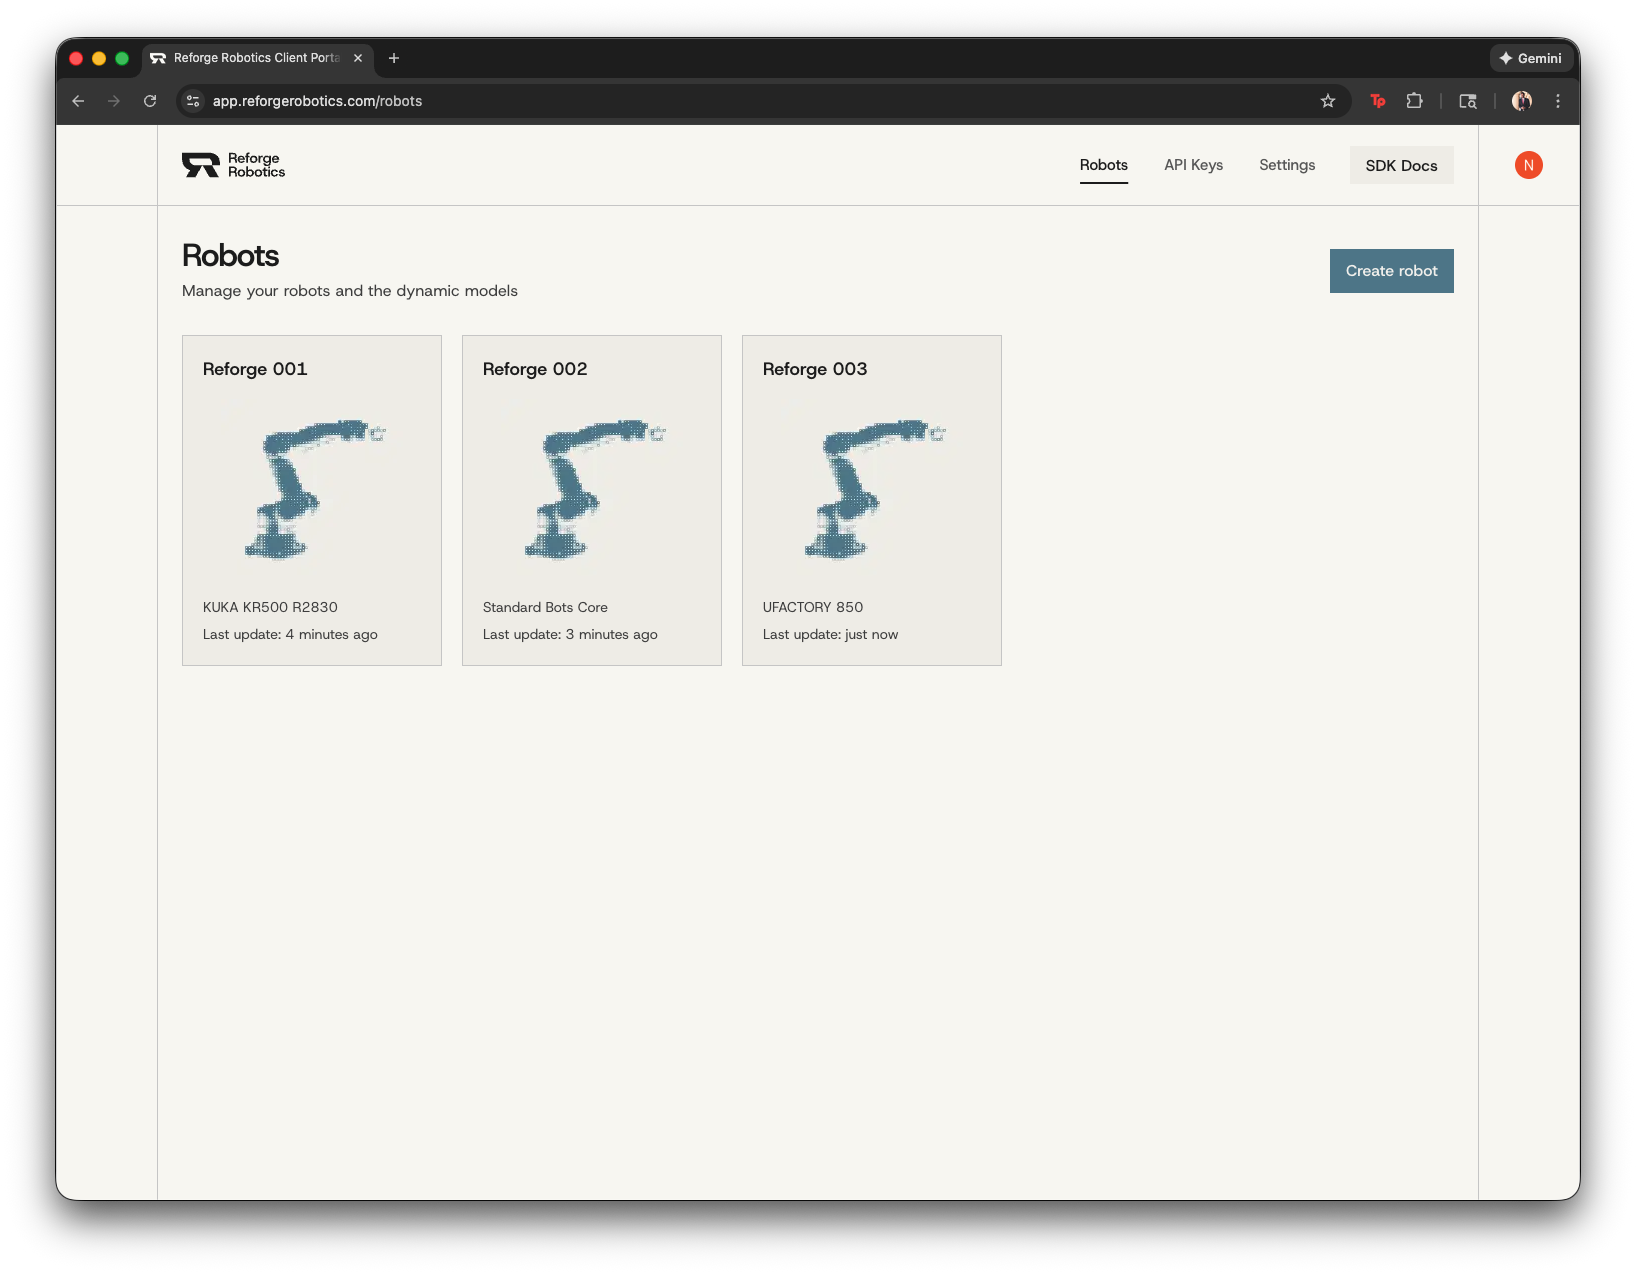
You can choose an existing robot integration if it is available. Otherwise, you can integrate your own robot in Step 3.
Step 2: Generate an API Token and Copy the Robot ID
Before calibration, generate a Reforge API token and copy the robot ID from your Reforge Robotics account. You will use the API token and robot ID for cloud identification.
API tokens are shown only once when created. Store the API token securely. If you lose it, generate a new one.
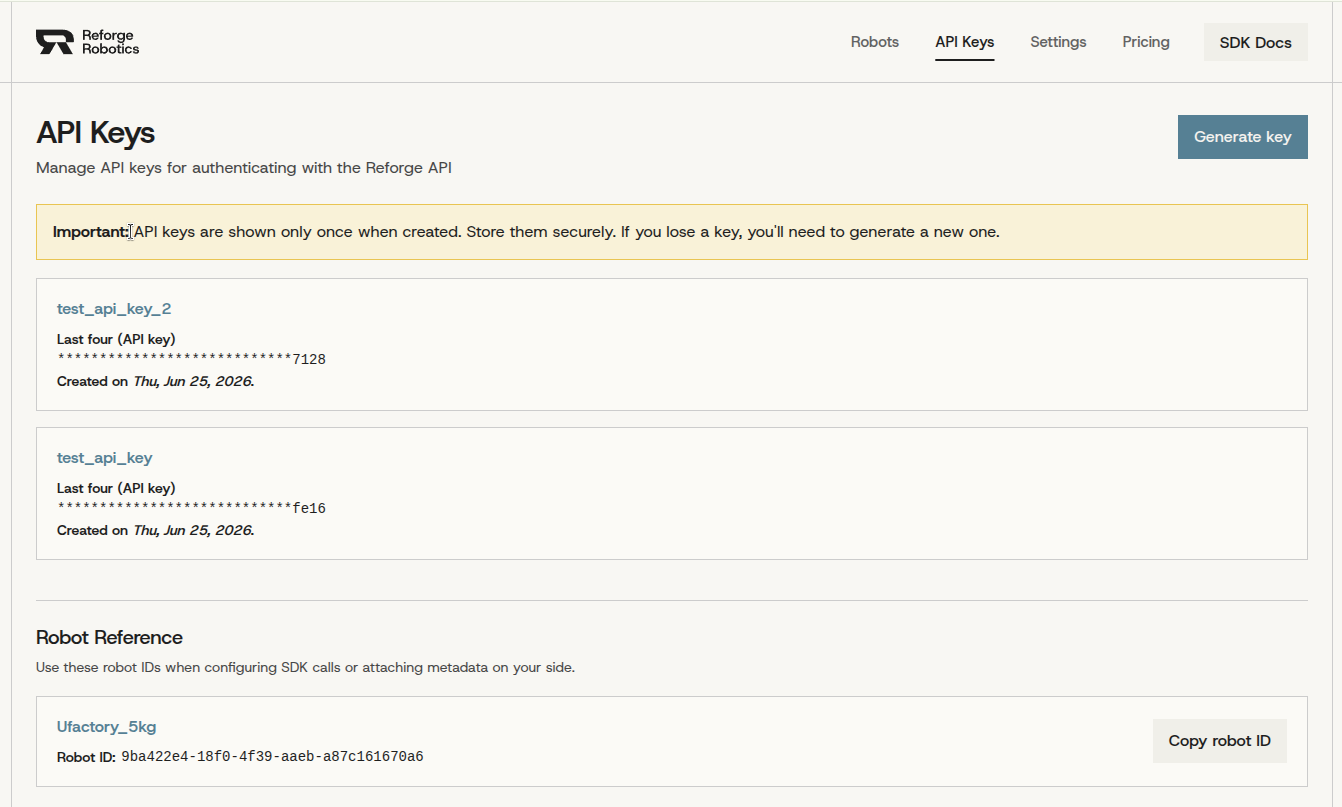
The API token and robot ID are available at app.reforgerobotics.com after you complete registration.
Step 3: Integrate Your Robot and Install
Check the Robot Integrations section to see if we already have an integration for your robot that you can download and install. Otherwise, you can integrate your robot automatically or manually by cloning and following the instructions from the Quick Start section of the README in the reforge-interface repository.
Step 4: Prepare the Robot and Test the Connection
Reforge calibration pushes the robot through identification motions. Before running calibration, set the robot safety limits to the most permissive values allowed by your test procedure:
- Increase joint and task-space velocity limits.
- Increase joint and task-space acceleration limits.
- Increase jerk limits, if the robot exposes them.
- Increase collision thresholds for the calibration test.
Then verify that the PC can connect to the robot:
bashpython3 -m robot.run connect_test \
  <ROBOT_IP> \
  --local_ip <LOCAL_IP> \
  --sdk_token <ROBOT_SDK_TOKEN> \
  --robot_id <REFORGE_ROBOT_ID>
If your robot SDK does not require --local_ip or --sdk_token, omit those arguments.
After going over all these steps, you should be able to use all modules of Reforge SDK.
Next Steps
Choose the Covalent module you want to use: